
You'll learn: how to create a Claude Project with custom instructions and files, so every chat inside it already has your context — no re-explaining. You'll walk away with: the Claude Project Starter Kit — a setup checklist + a reusable instructions template. Level: Beginner, hands-on · Prereq: How AI Remembers You
⏱️ Heads-up on screenshots: captured on the Claude Team plan, June 2026. Claude's interface changes often — if a button is named slightly differently in your version, the steps still apply. (This lesson is reviewed every ~60 days.) Projects are available on Claude's paid plans (Pro/Team/Enterprise).
1. The Problem
If you find yourself pasting the same background into Claude every single time — "we're a coffee brand, our voice is X, here's our product list…" — you're doing manual work the tool can do for you. A Project is a reusable workspace: set the context once, and every chat inside it starts already knowing it.
In the memory lesson we covered why Projects exist (curated, persistent context you control). Now let's actually build one — a demo "Brew Lab" coffee-brand Project — in about five minutes.
2. Step 1 — Create the Project
Open Projects from the left sidebar and start a new one. You'll get the Create a project dialog, which fills in like a tiny brief:
- What are you working on? → the project title. (e.g.
Brew Lab) - What are you trying to achieve? → a short description of the project's job. (e.g. "Brand assistant for Brew Lab, a specialty coffee company.")

If you're on a Team or Enterprise plan, you'll also pick Visibility:
- [Your Organization] — everyone in your org can view and use it.
- Private — only you (and people you invite) can.
Choose Private unless you specifically want to share it. Then click Create project.

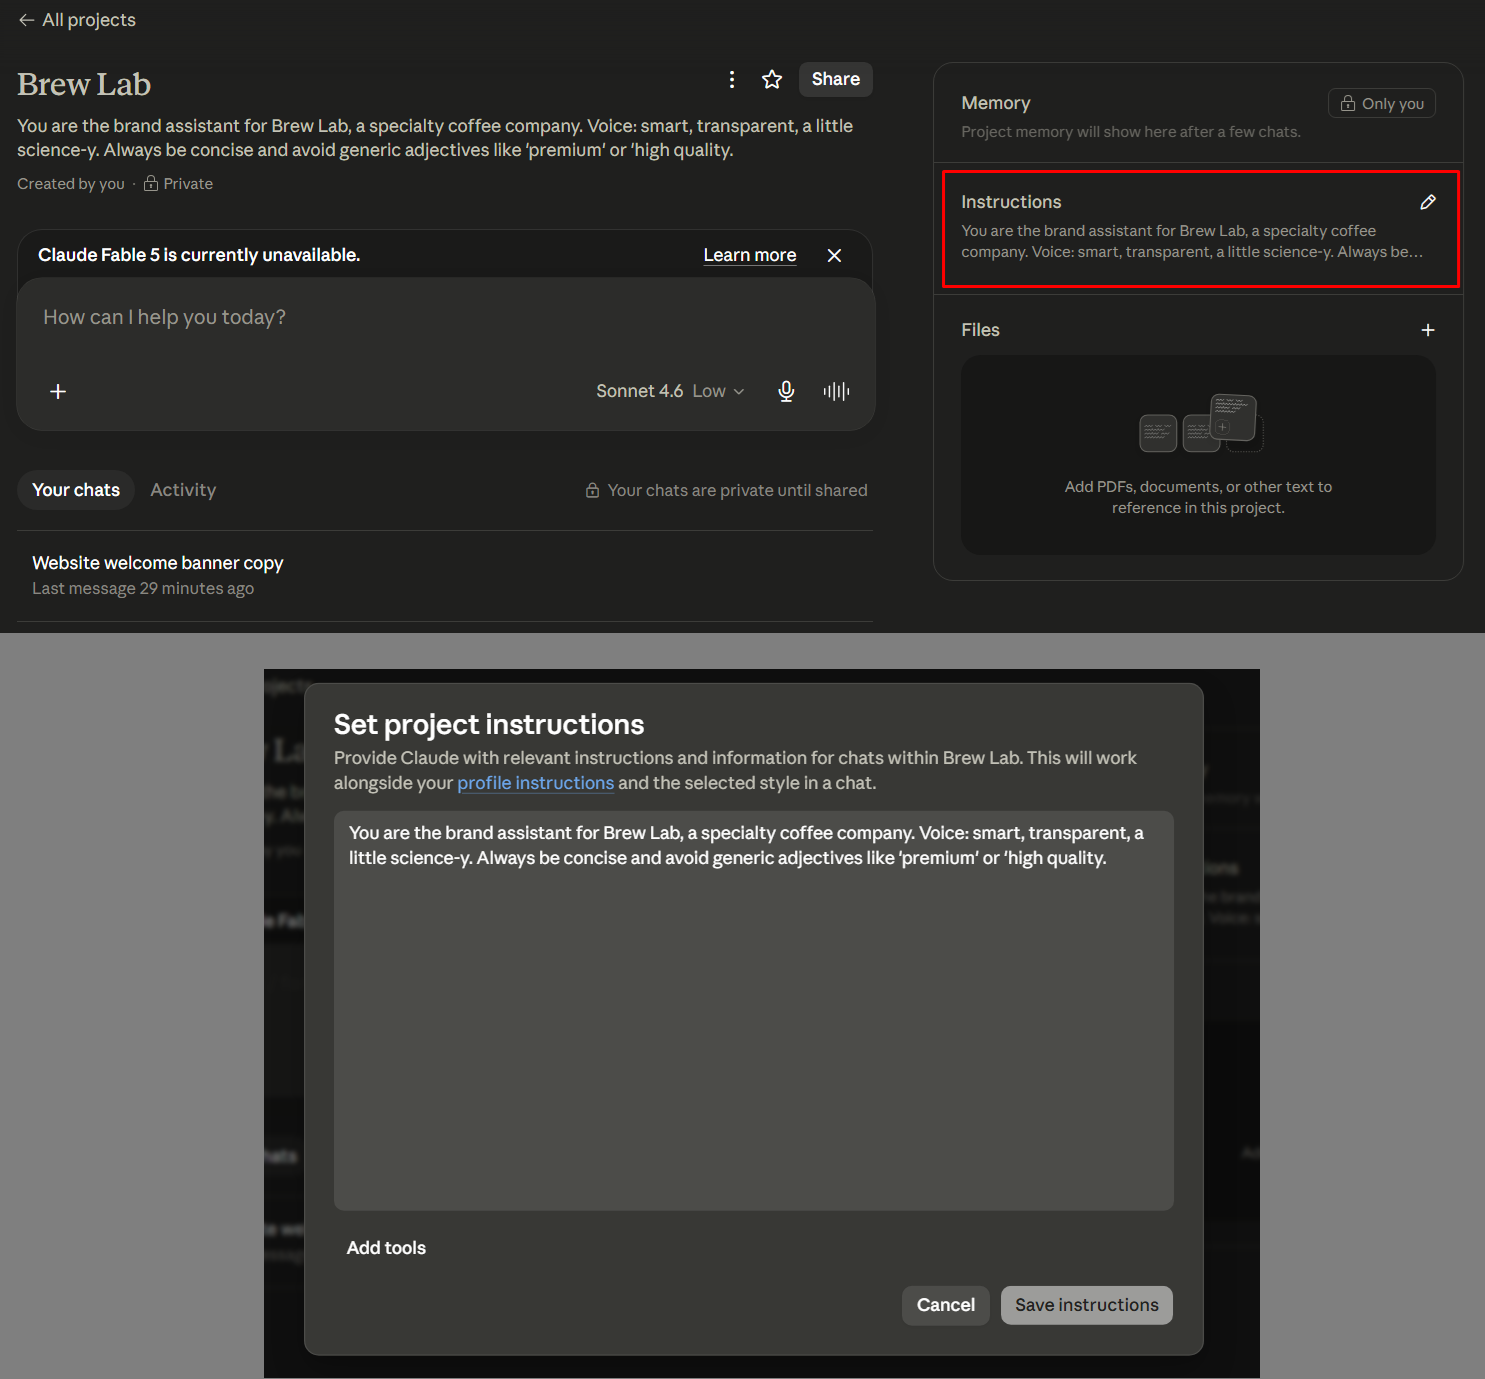
3. Step 2 — Set the Project Instructions (the important part)
This is where a Project earns its keep. On the Set project instructions screen, tell Claude how to behave for every chat in this Project. The UI notes these instructions "work alongside your profile instructions and the selected style" — so this is Project-specific guidance layered on top of your personal settings.
Paste in your standing rules. For Brew Lab:
You are the brand assistant for Brew Lab, a specialty coffee company.
Voice: smart, transparent, a little science-y.
Always be concise and avoid generic adjectives like "premium" or "high quality."
Then Save instructions. (There's also an "Add tools" option here — we'll cover tools in a later lesson.)
💡 This is where everything you learned in Prompt Engineering pays off — your role and constraints go here once, and apply forever.
4. Step 3 — Add Your Files (the Project's knowledge)
On the Project overview, the Files section lets you add the documents every chat should be able to reference — "PDFs, documents, or other text." For Brew Lab that might be a brand-voice guide, your product list, or past campaigns.
You'll also see two more sections:
- Instructions — what you just set (editable anytime via the pencil).
- Memory — "Project memory will show here after a few chats." Projects build their own memory, separate from your personal memory.
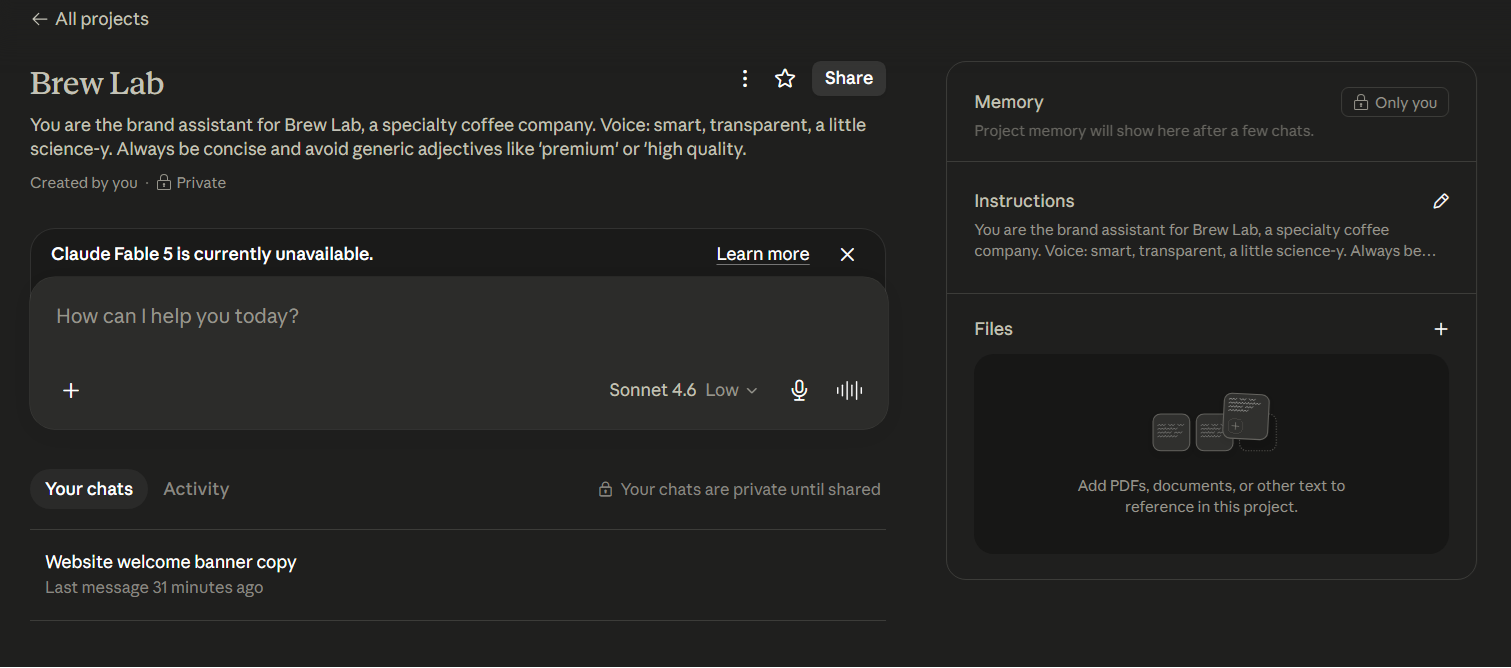
🔑 Instructions = the rules. Files = the knowledge. Both stay loaded for every chat in the Project.
5. Step 4 — Use It (the payoff)
Now start a chat inside the Project and watch it apply your setup automatically. I asked:
"Write a one-line welcome banner for our website."
With no extra context, it returned:
"Where every cup starts with a question worth asking."
Concise, curious, science-y — exactly the Brew Lab voice, and not a "premium" in sight. I never re-explained the brand; the Project instructions did it.

🔑 Every chat inside the Project inherits the instructions + files. Set up once, benefit forever.
6. What's Worth Putting in a Project
| Put this in Instructions | Put this in Files |
|---|---|
| Brand voice / tone rules | Brand or style guide (doc) |
| Who the AI should act as | Product lists, price sheets |
| Formatting preferences | Reference docs, specs, reports |
| Things to always avoid | Past examples to match |
A good rule: if you'd otherwise paste it into most chats on this topic, it belongs in the Project.
7. Common Mistakes
| Mistake | Fix |
|---|---|
| Re-pasting context every chat | Put it in the Project instructions once |
| One giant Project for everything | One Project per topic/client/brand |
| Leaving visibility on "organization" by accident | Choose Private unless you mean to share |
| Putting documents in the instructions box | Use the Files section for docs |
| Forgetting to update it | Edit instructions (pencil) as things change |
8. Your Takeaway
A Claude Project is a reusable workspace: set the instructions (the rules) and files (the knowledge) once, and every chat inside it starts with your full context. It's the cure for re-explaining yourself.
📥 Download the Claude Project Starter Kit (free) — a setup checklist + a copy-paste instructions template. (Email opt-in.)
9. Your Challenge
Do this now: create one real Project for something you work on repeatedly (a brand, a course, a client). Add a few lines of instructions and one reference file. Then start a chat and ask for something without giving any background.
You did it right if: the answer reflects your instructions/files with zero extra context — and you can name one thing you'll never have to re-paste again.
Keep going: ← How AI Remembers You · More power features → Artifacts · Extended Thinking · Web Search & Files · Then: fill your Project with expert prompts →